The Photos app in Windows 10 automatically includes the default Windows picture folders.
Including these folders imports their contents into the Photos app.
If youve enabled the setting, Photos can also perform facial recognition on the photos in your included albums.

This guide will walk you through the process of importing an album into Photos.
Importing a new album
Tip: Any imported folder also includes all subfolders.
The first step is to launch the Photos app.
To do so, press the Windows key, throw in Photos and hit enter.
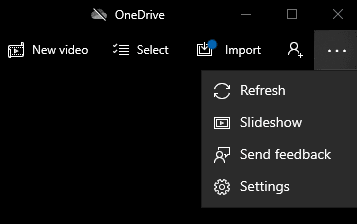
kick off the tweaks by clicking the ellipsis icon in the top-right and then clicking tweaks.
opt for Add a folder button, its the topmost option in the tweaks.
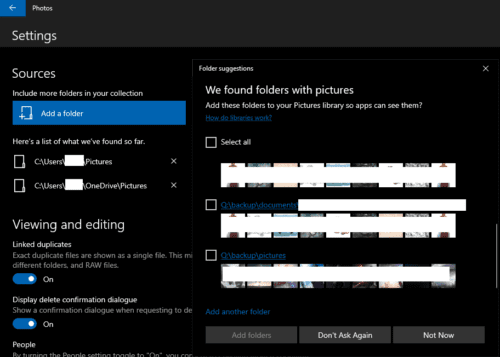
This may open a window that will suggest a few folders as potential albums you might want to import.
These suggestions will also include a small sample of thumbnail images from the folder.
If you want to import any of those folders, just tick the relevant checkbox.

Tip: you’ve got the option to import multiple suggested folders at once.
Select from the suggested folders if appropriate and click Add folders.
This will add it to the list of suggested folders and automatically select it.
Your photos will now appear in the Collection and other tabs.
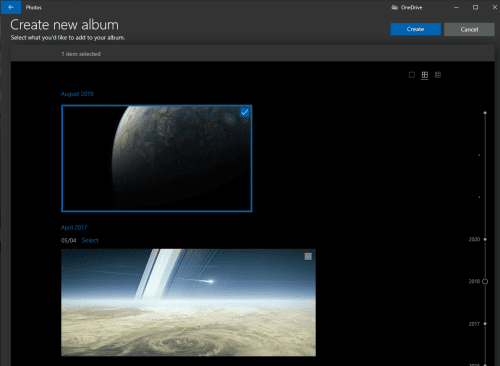
choose the Albums tab in the top bar, then click New album.
Click New album in the Albums tab.
grab the photos you want to include in the new album then click Create.
Just pop in your new album name then hit enter.
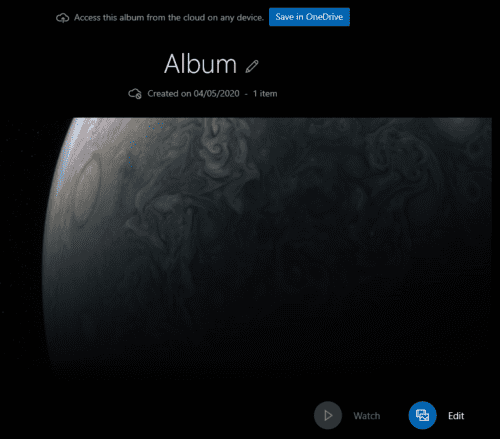
Name your album by clicking the pencil icon next to the default name of Album.
To exit this view and return to the main albums list, grab the arrow in the top-left corner.
Your new album will now appear in the album list.
