Windows 10 has improved upon such tools to make it a lot easier to take care of the business.
One of the uses and the little-known tool is Automatic Maintenance.
What is Automatic Maintenance?
Automatic Maintenance runs in the background anytime you are idle, which includes the time you sleep.
It pause the operation automatically when user starts working and resume again when again system become idle.
How to Enable / Run / Schedule Automatic Maintenance in Windows 10
1.
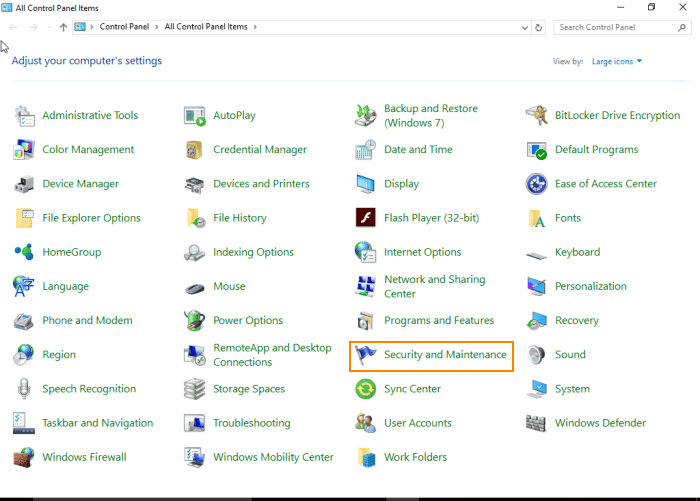
Go to control panel and click onSecurity and Maintenancetab.
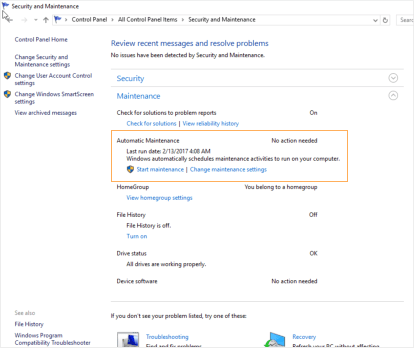
Now click onMaintenancetab to expend its more options.
Here you will find the Automatic maintenance with 2 buttons on itStart MaintenanceandChange maintenance parameters.

Refer to below screenshot.
select Change maintenance setting which bring up the screen as in the below screenshot.
pick the best time to schedule automatic maintenance when your PC have free time.
Alternatively it’s possible for you to use the below command line to run it directly.
pop in the following command in Run windows.
So see the below steps that how you might disable to run this feature automatically.

How to Disable Automatic Maintenance in Windows 10
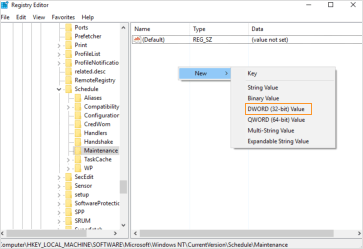
HKEY_LOCAL_MACHINE\ SOFTWARE\ Microsoft\ Windows NT\ CurrentVersion\ Schedule\ Maintenance
3.
Make aDWORDvalueMaintenanceDisabledif it does not exist already.
Right Click and in New and punch DWORD value as like in below screenshot.
Double-click theMaintenanceDisabledand set the data value to 1 as seen in below screenshot.
