Theyre quicker to throw in than passwords and generally easy to remember, too.
However, you might want to disable this feature or re-enable it later on, at your convenience.
Heres how to disable and enable PIN codes in Windows 11.

Windows 11 makes this process easy directly in the configs menu.
To disable your PIN code:
Step 1.launch the configs menu.
you’re free to access it from the Start menu or by pressing Windows and I keys together.
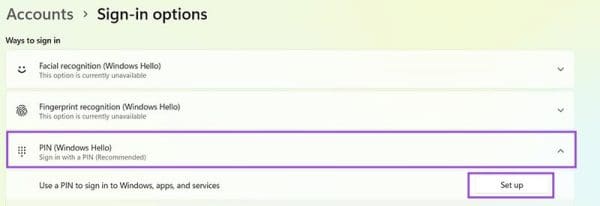
Step 2.press Accounts in the sidebar menu on the left.
Then click Sign-in options on the next screen.
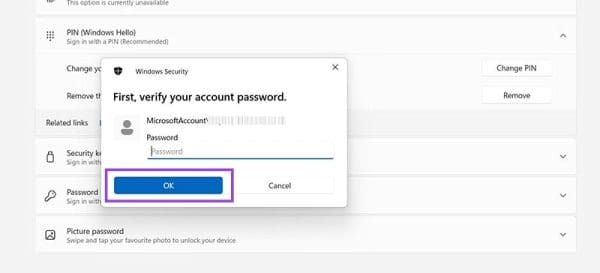
Step 3.punch PIN (Windows Hello) and click Remove next to Remove this sign-in option.

(Optional) If Remove is greyed out for you, theres one last step.
you’re gonna wanna look down the same Sign-in options page you were on.
Then, close options, reopen it, and the Remove button should be visible.

Step 5.Youll be prompted to sign into your account.
To enable PIN codes:
Step 1.fire up the prefs.
Step 2.Go to Accounts and then scroll down a little and click Sign-in options.

Step 3.Click PIN (Windows Hello) and then click Set up.
Youll then be prompted to log into your account, so enter the password to proceed.
Step 4.punch in in your PIN.
punch in it exactly the same in both boxes, then click OK.
Wait a moment for the system to log your change.
The next time you jump in, youll be prompted for your PIN.