The filename and file extension are separated by a dot.
The file extension defines the jot down of file, like abc.txt.
It tells that it is a text file and can be opened in WordPad.

By default, file extensions remain hidden or disabled on Windows computers.
If we can see the file extension, we can know the file bang out or file format.
We can enable or show the file extensions along with the filename.
For example, audio files have extensions .mp3, .wav, .wma and more.
File extensions help the operating system to identify the corresponding program to open that particular file.
Also, a regular Windows user should have no problem identifying the file throw in.
There are many reasons for wanting to know this information.
However, security is one of the most essential aspects.
Lets look at an example.
We know that file names allow you to use multiple dots.
Thus, the real name of a malware file could befinal.docx.exe.
It will think it is a Microsoft Word document and give a shot to open it.
Consequently, it will infect your gear.
This way, you’re free to identify that it is actually an executable.
Besides, probably, a malware file.
This is how you might tell if a file is malicious or suspicious and protect your PC.
Another reason is that sometimes we need to rename the file extension for certain reasons.
There are several ways to show or hide file extensions in Windows 11.
Lets go through all of them one by one.
How to hide or unhide file extensions in Windows 11 through File Explorer options?
Step 1:
The first thing you have to do is to go to the file explorer.
With this in mind, just choose the shortcut in the taskbar.
Alternatively, you’re free to hit the Win+E combination.
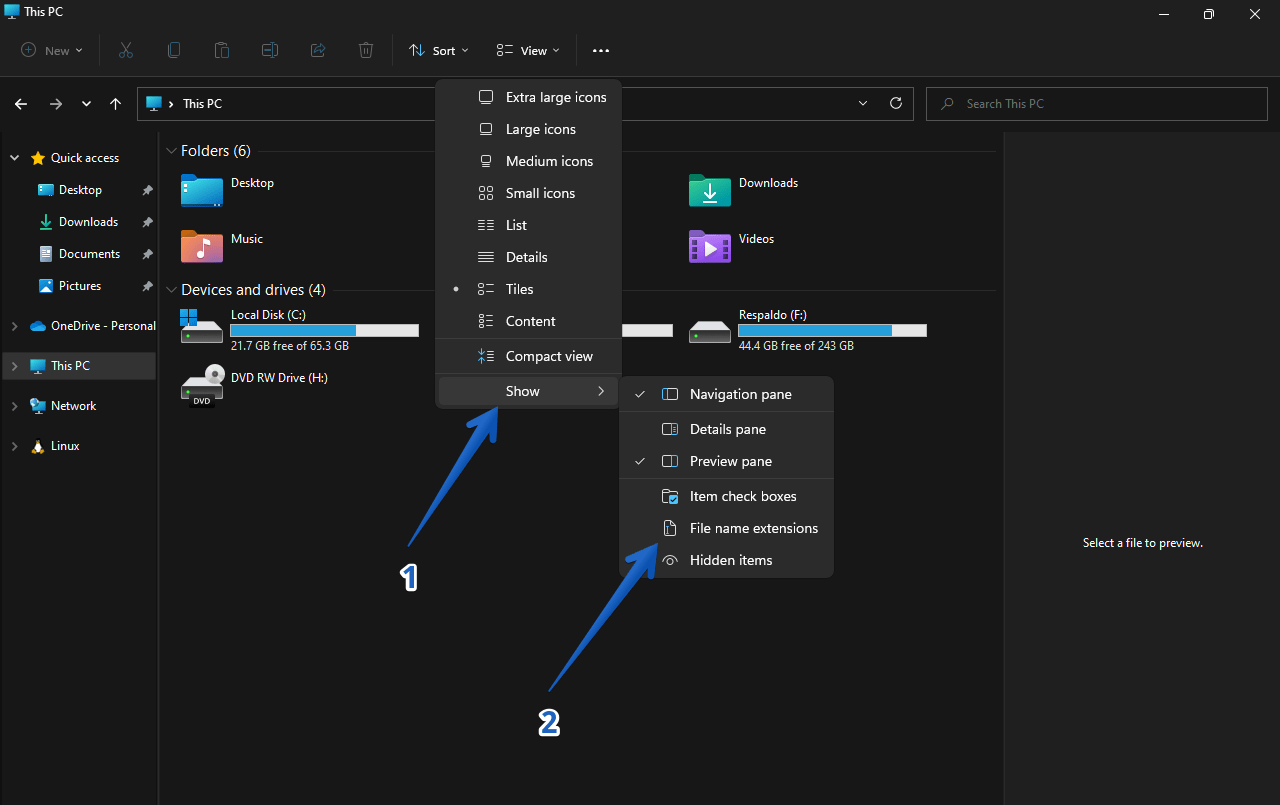
Once there, click onView.Then scroll down toShow.
A new menu will be displayed.
Therefore, select theFile name extensionsoption.
you could toggle the option from here.
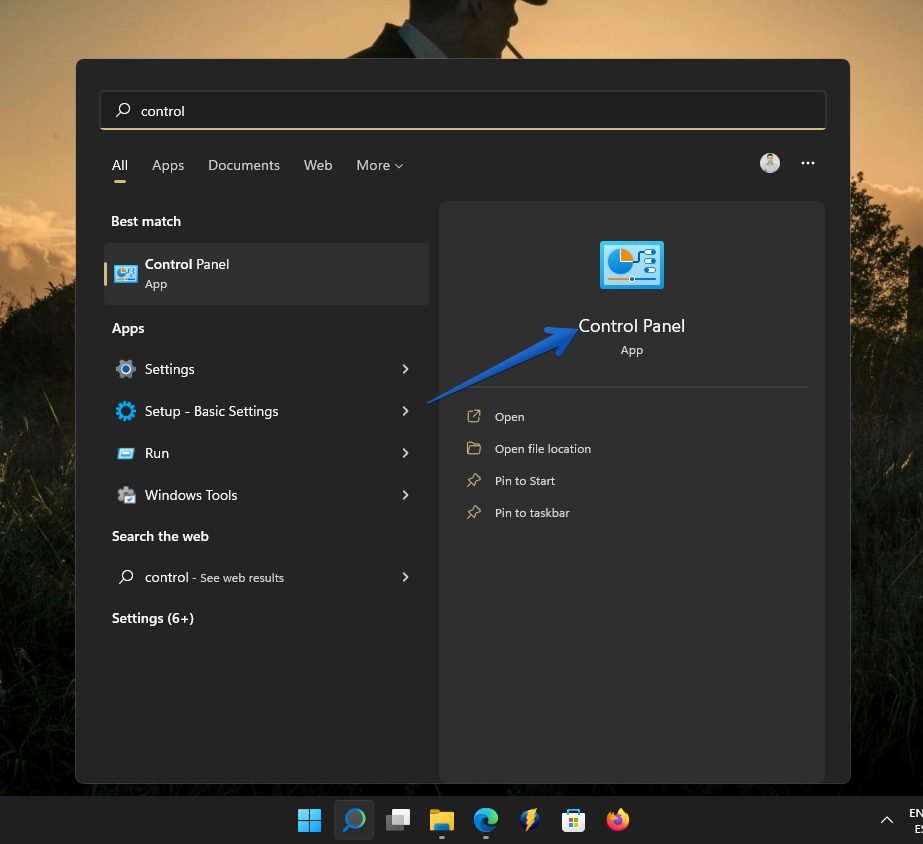
you’ve got the option to enter by searching in the start menu.
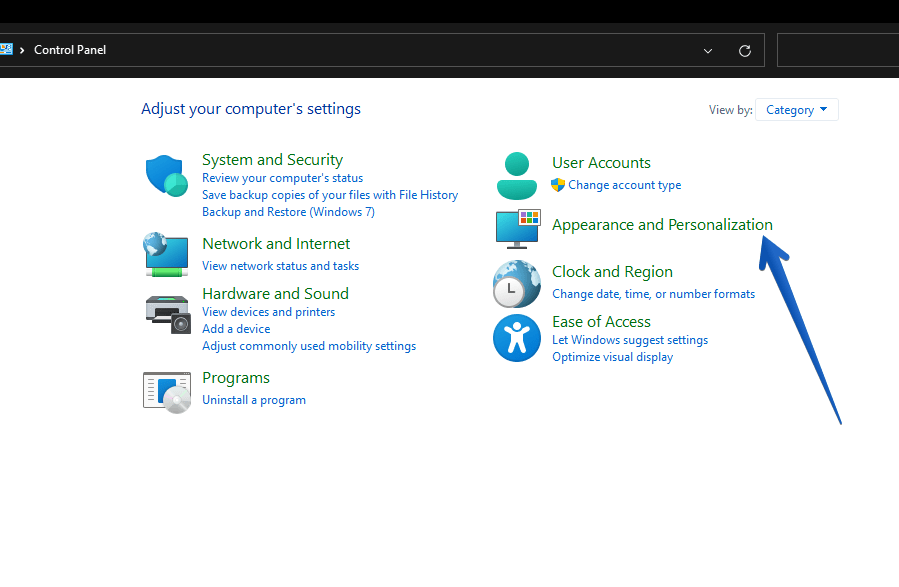
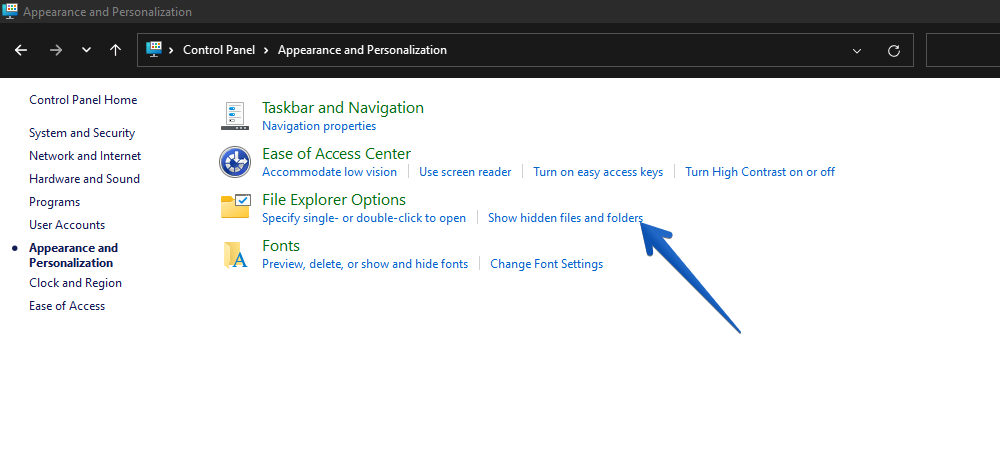
Once there, yo click onAppearances & Personalization.
The options we are interested in are those related to the File Explorer.
kindly click onShow hidden files and folders.
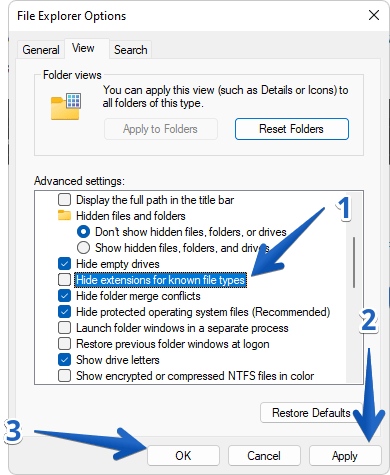
Step 4:
A floating window displays various options.
like uncheck theHide extensions for known filescheckbox.
Next, clickApplyand thenOKto confirm the changes.
As in the previous example, simply uncheck the box to revert to the previous example.
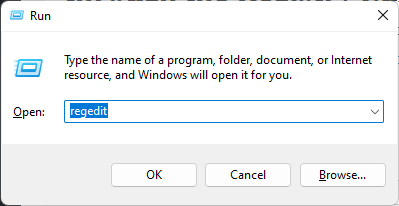
Finally, lets see how to perform the task using the Windows registry editor.
The first thing you have to do is to invoke it by pressing the Win+R combination and executing theregeditcommand.
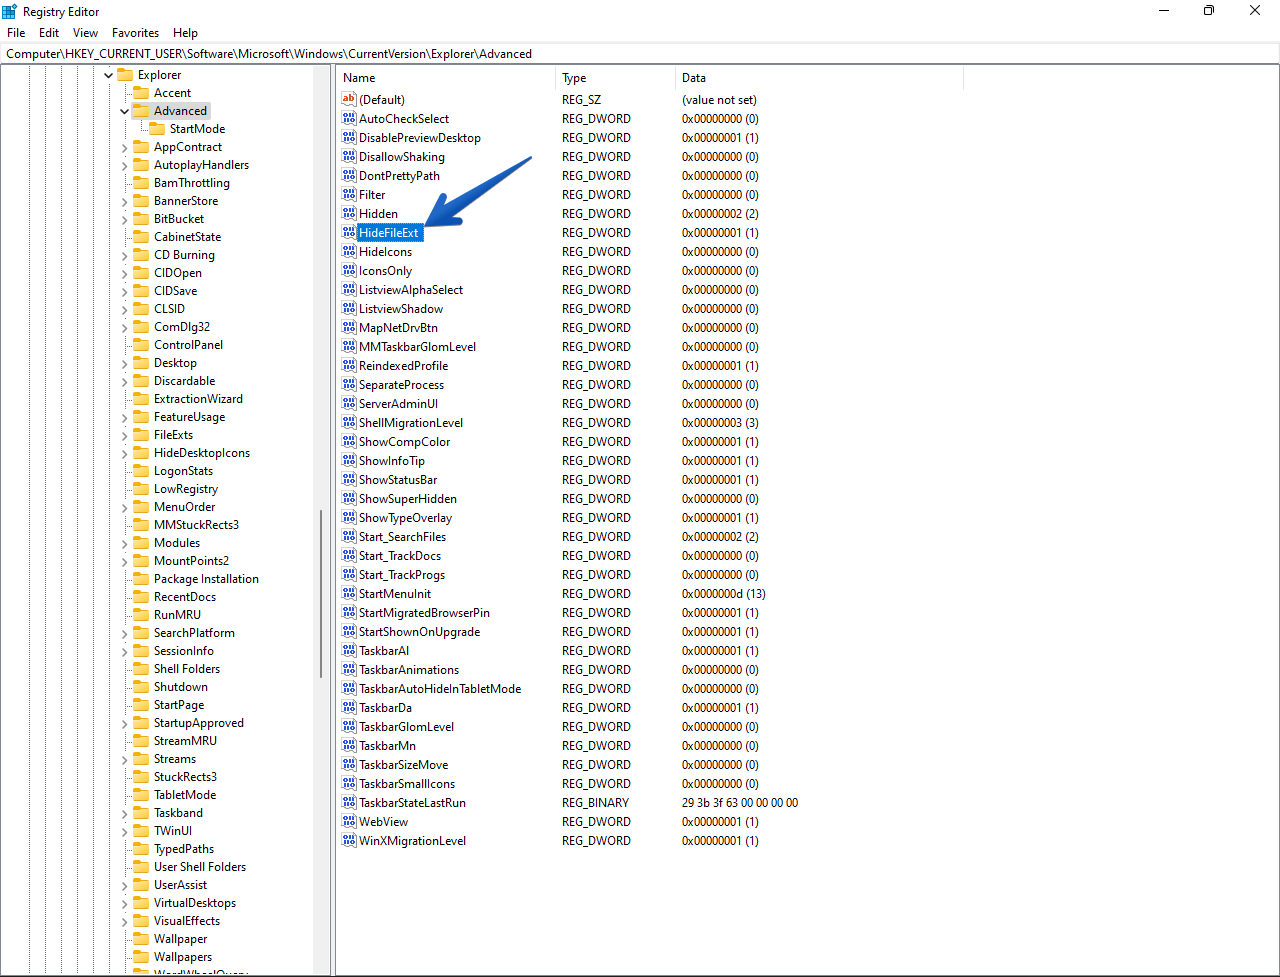
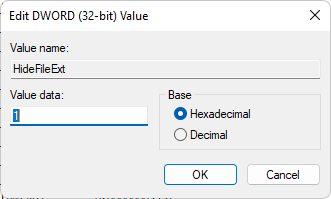
Look at the following image:
In the right sidebar, find theDWORDnamedHideExtFileand double-click it to open it.
As a result, a floating window opens.
After that, poke the OK button.
Finally, restart the computer to set the fields.
Also check: how to enable
