Marvel Rivals has taken the gaming world by Storm (pun intended).
Many have called the issue a memory leak, but there are several possible reasons why it might happen.
Here are the best Marvel Rival memory leak fix options and other recommendations to enhance your gaming sessions.

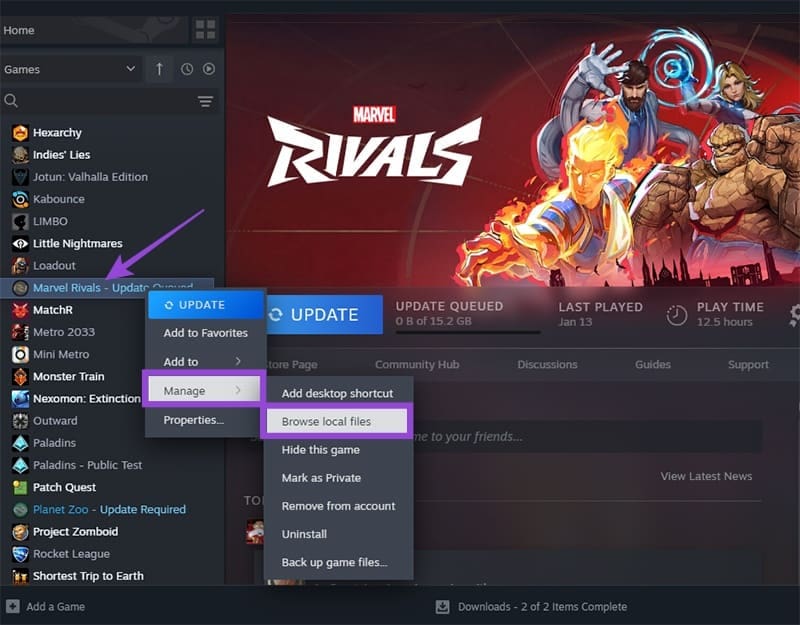
Step 1.Go to the actual folder where the game is stored.
Right-hit the game, select Manage and choose Browse local files.
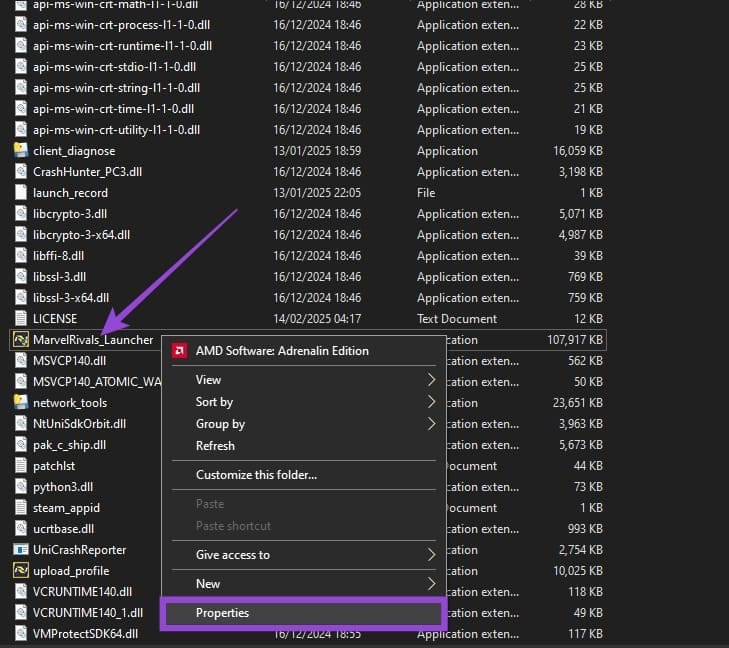
Step 2.In the folder, scroll down and right-punch MarvelRivals_Launcher, then select Properties.
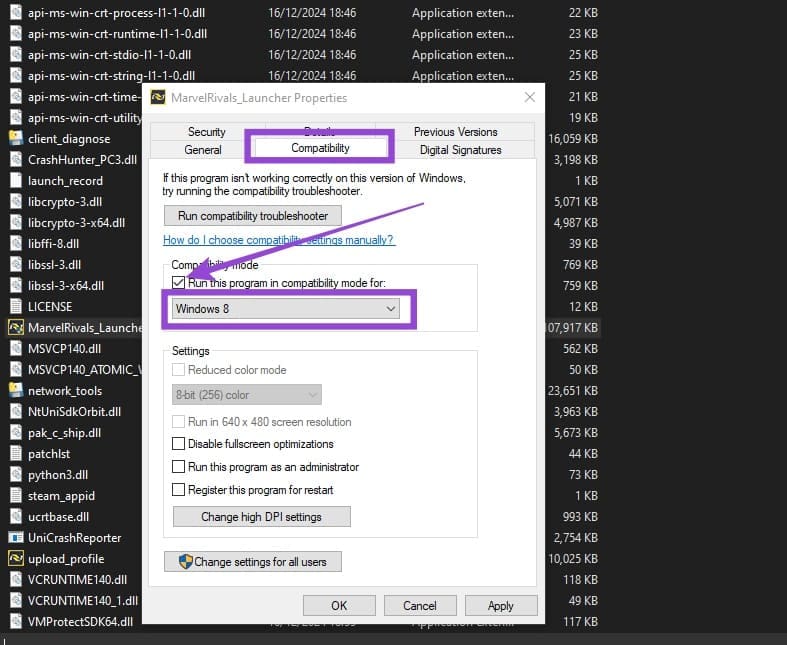
Step 4.choose Apply, then start the game.
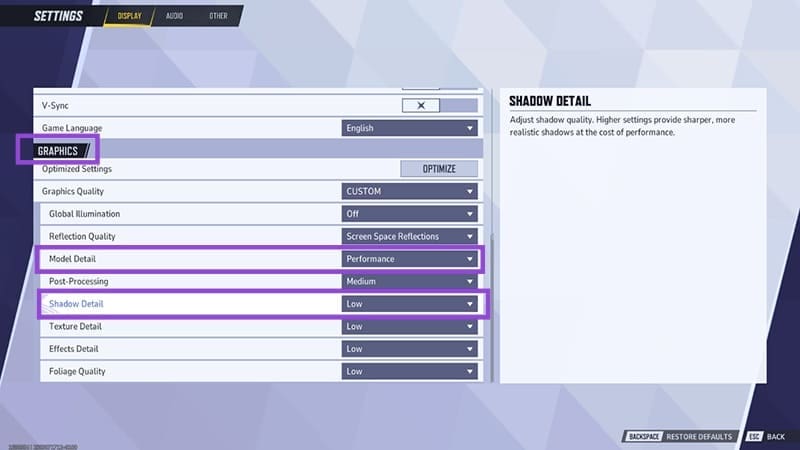
However, other graphics options can influence the graphics load and potentially allow you to eke out performance.
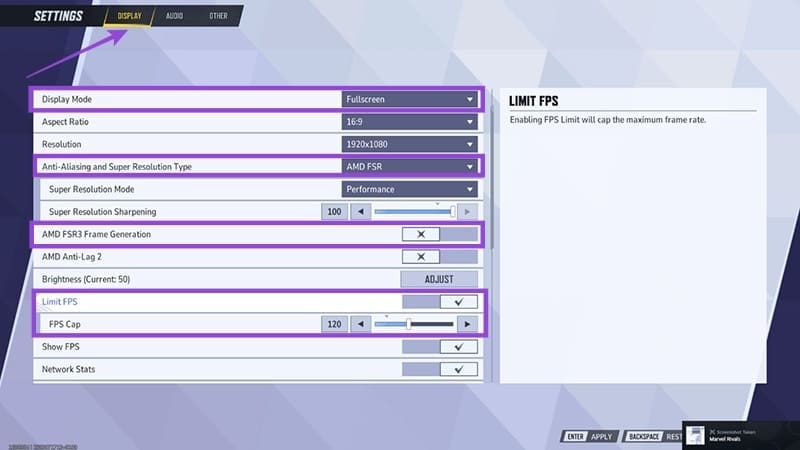
Step 1.kick off the game.
Step 2.Press Escape and select Options.
Then, set the Model Detail setting to Performance.
Step 5.Lower shadow and texture details, as these affect RAM usage the most.
Step 6.Press Escape to accept the changes, then restart the game.
Step 1.Open tweaks, go to the System tab, then choose Display.
Step 2.Under Related tweaks, choose Graphics.
Step 3.Find Marvel Rivals from the list of apps or add it via the Add an app button.
Step 4.In the options, disable Auto HDR and hardware-accelerated GPU scheduling.
Hardware-accelerated GPU scheduling might be available if you click Change default graphics configs above the app list.
Step 5.In the same window, set the GPU preference to High Performance.
For NVIDIA GPUs, this is the NVIDIA app.
For AMD GPUs, its called AMD Adrenaline.

Both apps should be running in the background at all times.
Find the app in your taskbar, open it, and choose Update drivers or Update app version.
Some users have also suggested rolling back a driver if youve recently updated them.

NVIDIA graphics also have a cache that has been known to cause memory leaks.
Step 1.Right-select This PC and select Properties.
Step 2.Choose Advanced system controls.

Step 3.In the Performance section, select prefs.
Step 4.Go to the Advanced tab and select Change in the Virtual memory section.
Dont go over the Space available as that will cause more issues.
Step 6.select Set, then OK through the windows and reboot your PC.
