A computer user wants to have the most comfortable user experience.
That means being able to quickly access your files.
It also allows you to find files on your drives.
On the other hand, this search is more accessible since it is located in the taskbar.
However, the Windows search will not find content within system files.
This happens because this option is disabled by default.

So, it is necessary tomodify the indexing optionsto extend the search range.
We have given both the steps down below.
like check them out.
Steps to make Windows 10 to search in file contents
There are two methods to do this.
hey follow the following steps.
Enable File Contents option
you gotta just unlock the file contents option in advance search option.
Lets see how to do that.
Lets see how we can do this.
1.Go to the folder locationwhere you want to search the file which has a particular text.
Or go to my-computer / This PC.
And then initiate the drive or path which you where you want to search.
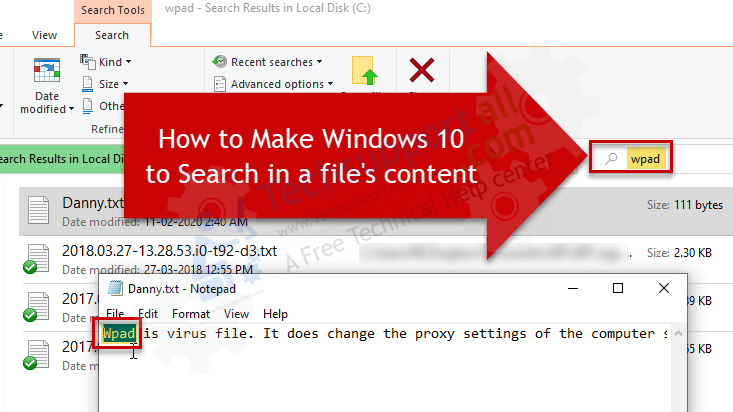
Click onSearch barandtype your search query.

- choose Search and then choose Advanced options.
It will expand it and show some more options.
5.Clickon the checkbox of File Contents option.
yo see the following screenshot.
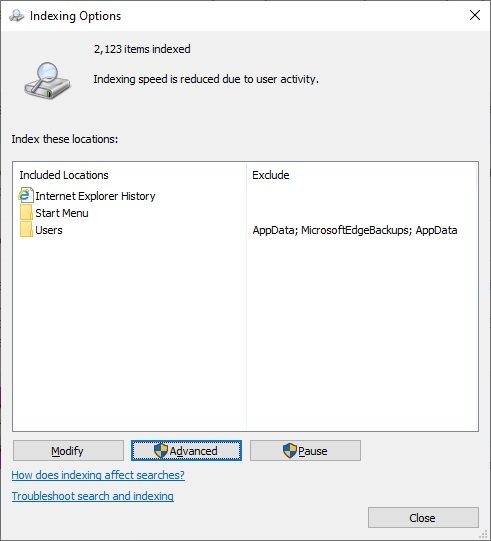
As we mentioned before, it is necessary to modify the indexing options of Windows 10.
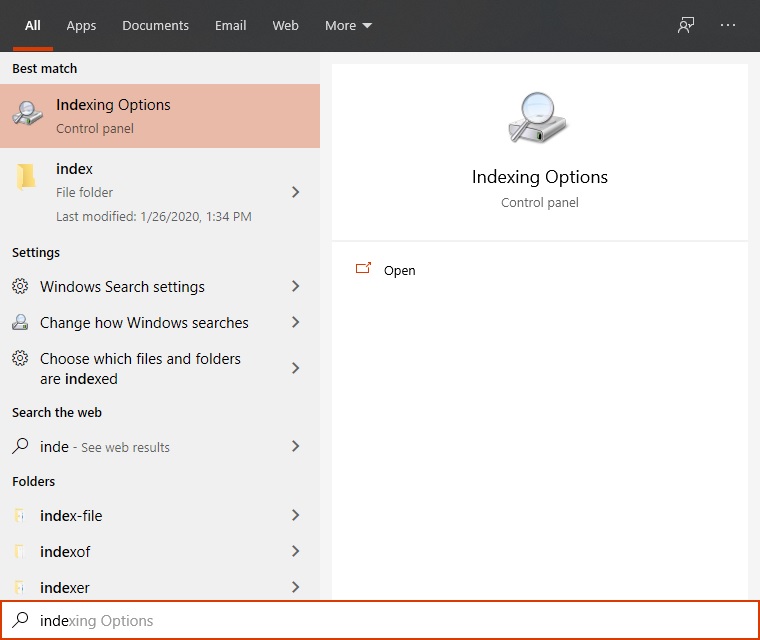
With this intention, press the combination Win+Q and typeIndexing:
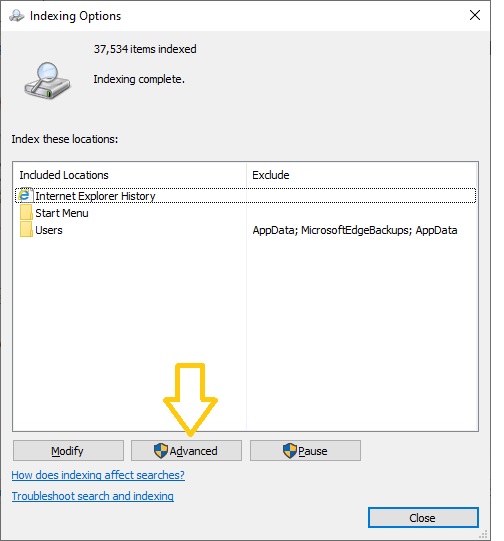
This screen will immediately be displayed.
Forthwith, the advanced options menu will be displayed.
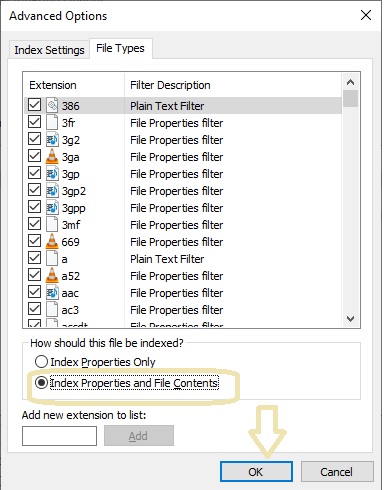
hey punch the file types tab.
Then tap on theIndex Properties and Files Contentsoption.
Press OK to start the indexing process.
The system will warn that the indexing process may take some time.
Also, some search results may fail.
Press OK and let the process begin.
The process may take time depending on the power of the computer and the amount of file.
But once the indexing is finished, you could search within the content of the files.
I hope this tutorial has been useful and you’re free to expand the range of your searches.
Thats all for now, see you!
