it’s possible for you to finally eliminate unwanted distractions by enabling Do Not Disturb on your iPad.
Do Not Disturb includes choosing what apps and people will be allowed to get through.
There are also focus filters you’re able to use.
Lets see how you might turn on do not disturb and customize it.
Also, the feature helps you improve battery life since it reduces power usage by limiting what gets through.
Enabling do not disturb on iPad is quick and easy.

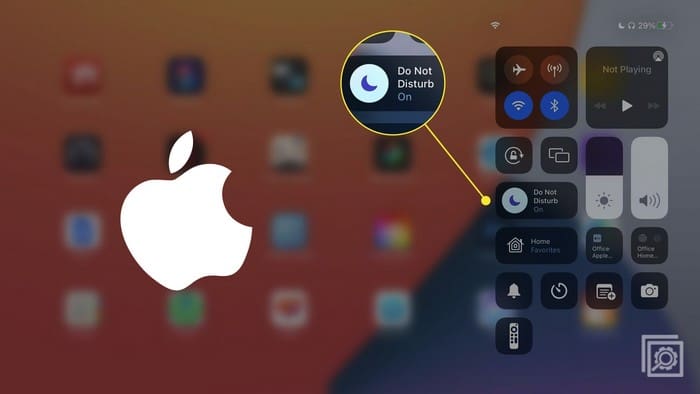
launch the Control Center byswiping downfrom thetop right of your display.
Tap onFocus, followed byDo Not Disturb.
The option will turn white and indicate that its on.

Tapping on the dots gives you control over how long youll leave it on.
Once inSettings, tap onFocus(from the list of options on your left).
Tap onDo Not Disturb; the first thing you might start customizing is the notifications.
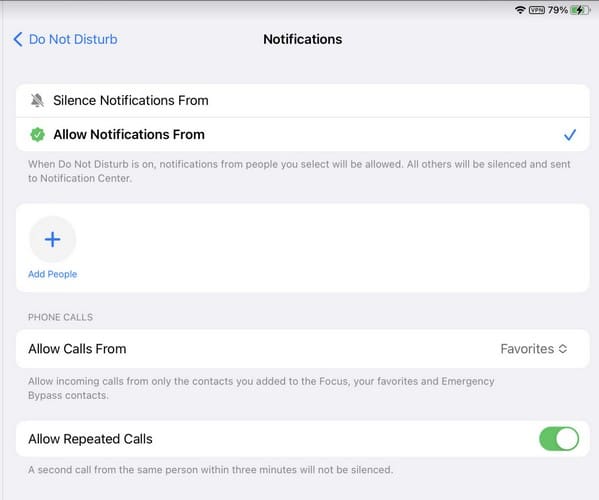
The first jot down of notification it’s possible for you to customize is the People option.
Choose whether you want to allow notifications from certain people or silence notifications from certain people.
Once youve chosen, tap the Add People option and add contacts.
Below youll also see an option to allow calls from certain people.
Thats it when customizing your notifications with iPads Do Not Disturb.
Suppose you dont tap on the Choose option to begin.
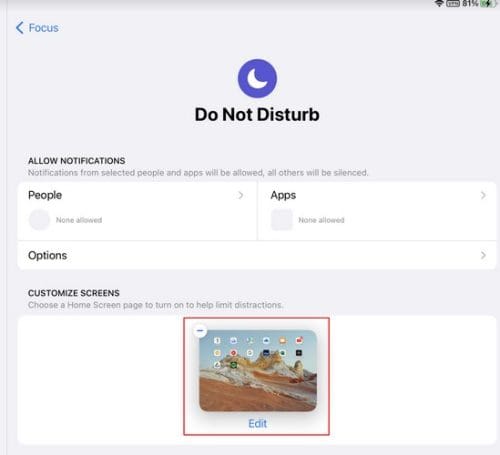
you might choose the home pages you want to access on the next page.
For example, you’re free to opt for one with only the apps you need.
you’re able to choose more than one home page.
The home screens you choose will appear in the Customize Screen section with a minus icon.
If you change your mind and want to remove a screen, tap on the minus icon.
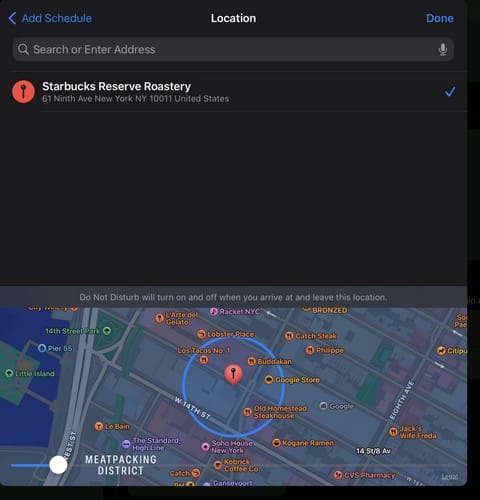
Tap the Add Schedule option and choose how to start this schedule.
This last option will activate the Do Not Disturb feature when you use a specific app.
Remember to add the days you want to apply the schedule.
On the list, youll also see that itll say its on.
App:The last option is simple to use.
When your iPad detects that youve started using the app you added, itll automatically enable Do Not Disturb.
The same applies to the remaining options listed above.
At the bottom of Focus Filters, youll also see the System Filters section.
Its also possible to set upDo Not Disturb on Zoom.
Conclusion
It can be tough to separate work from personal stuff.
You might be tempted to answer that email when you should be relaxing.
But with Do Not Disturb, you could decide what notifications you receive and what people can contact you.
you’re free to also modify Do Not Disturb even after youve been using it for a while.
