When connecting to a new web link, Windows will ask if thenetwork is publicorprivate.
In fact, if you connect from home, the usual thing is to set up a private connection.
Similarly, this configuration is recommended if the online grid is trusted.
However, if you are connected to an external online grid, then you must choose a public profile.
This is logical, since other users are also connected to that connection.
Therefore, it is advisable to protect yourself from possible attacks.
Today you will seehow to switch between private and public web link profilesin Windows 10.
What are the public and private connection profiles in Windows 10?
Broadly speaking, the significant differences are related to safety.
Indeed, when you set up a data pipe as Private, then the computer is discoverable.
That is, it is possible to connect to other computers, send and receive files.
On the other hand, when you are on a Public data pipe these functions are deactivated.
It is certainly possible to pull up the Internet, but the computer is isolated from others.
Consequently, attacks are avoided by preventing vulnerabilities.
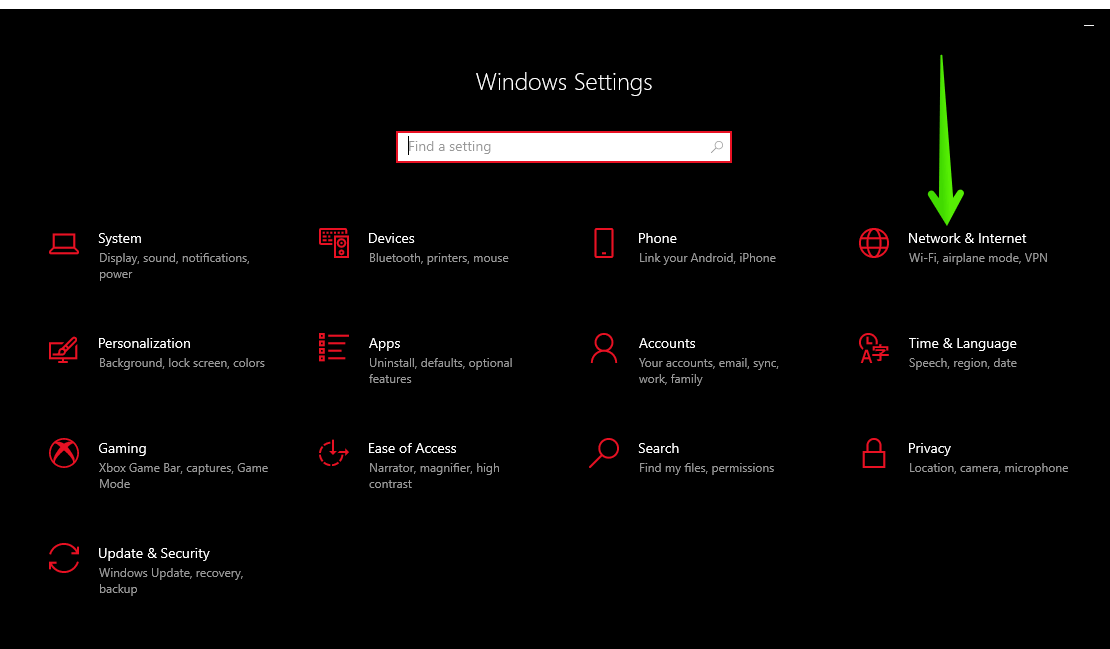
So first, press the Win+I combination.
Once youre there, click onNetwork & Internet.
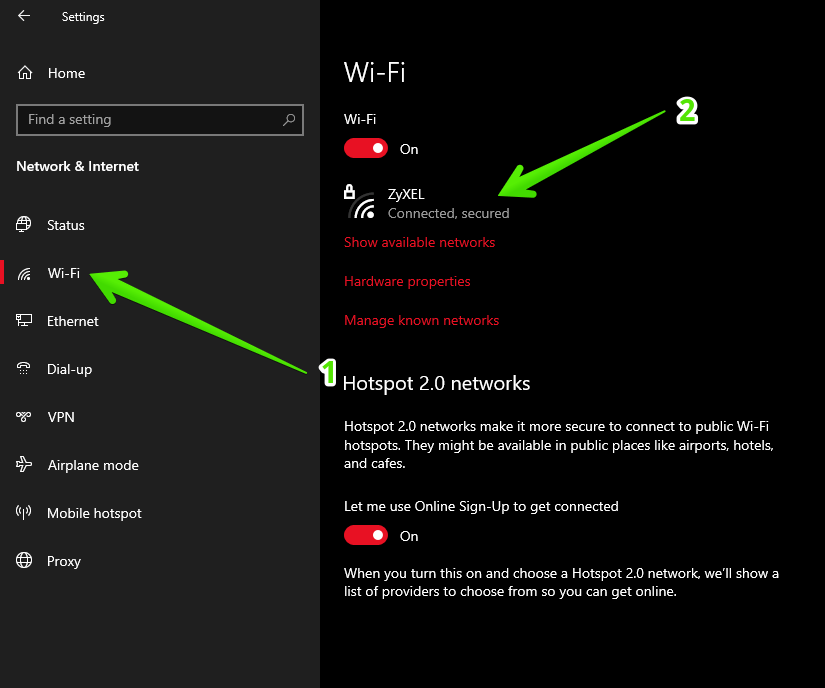
connection properties are immediately displayed.
Now you must tap on your connection throw in.
In this case Wi-Fi.
Then tap on the connection connection in the right column.
Relevant information about the current connection is shown below.
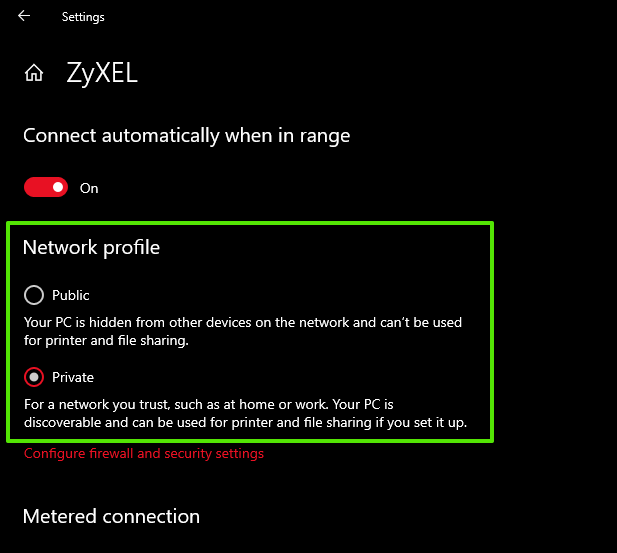
In this case, the selected profile is in Private.
So to make it public you just need to check the box.
If you want to reverse the process, just check the corresponding box.
