Windows 10 has many useful features.
In fact, the operating system itself offers solutions for most requirements.
Currently, information management is a primary activity.
With the advent of technology, many people store their data in their cloud.
However, traditional means of storing data still exist.
In this particular case, we refer to DVDs.
Steps to burn a DVD in Windows 10
There are two methods to do it.
One is to make a data CD and another one to make a media CD / DVD.
just follow the following steps.
Method 1 to Burn a data DVD
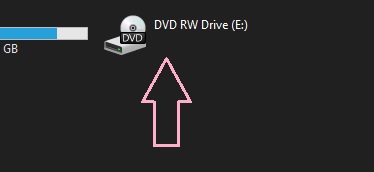
Obviously, the computer must have a DVD burning equipment.
Ablank DVDmust also beinserted.
Once the blank DVD has been inserted, the DVD burning wizard is usually displayed.
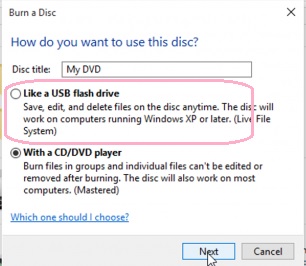
Pleaseselectthe first option:Like a USB flash drive.
The wizard will immediately startformatting the DVDto behave like a USB.
hey wait and do not remove the disk.
Once the process is complete, you could start burning the DVD.
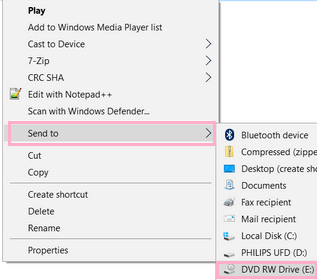
With this intention, group all the information you want to burn in a single folder.
Then,right-clickon your mouse and opt for option toSend to.
In the next menu,snag the DVD burning equipment.
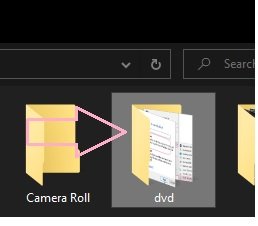
Just wait a few moments while the informationburns on the DVD.
Method 2 to Burning a multimedia DVD
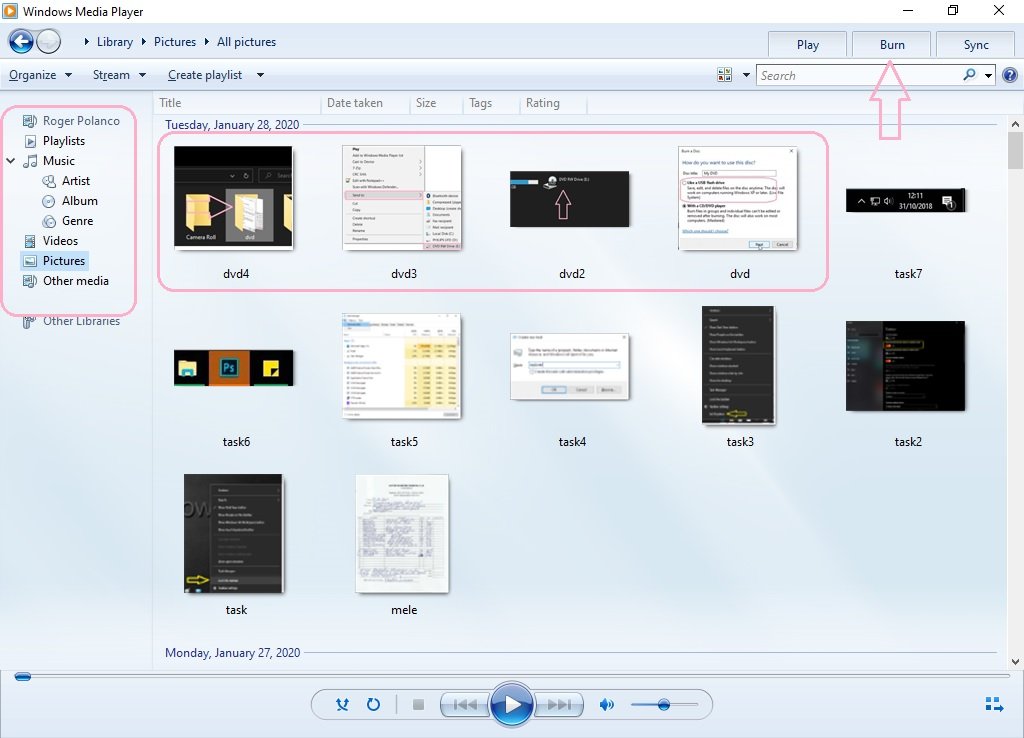
For this method, we will use Windows Media Player.
So as a previous step,group all the photos inside a folder.
The next step is to move the folder to the media library on your setup.
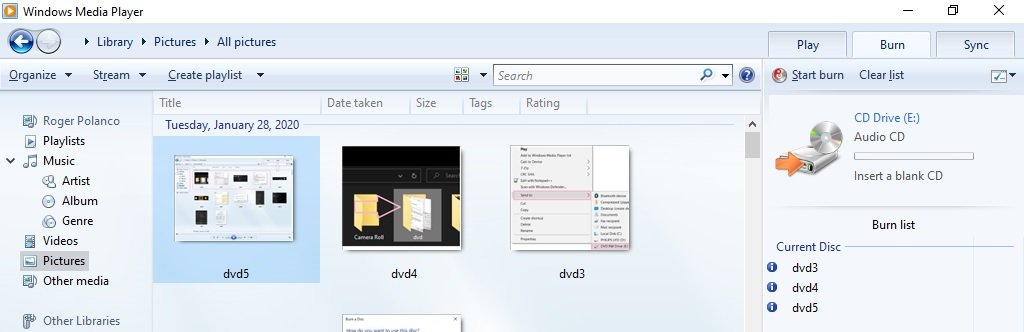
Once there,opt for images and then hit theBurnmenu located in the upper right corner.
Then drag all the items to the menu on the right.
After adding the files, just press SmartBurnto start the burning process.
Thus, we have seen a couple ofmethods to burn DVDs natively in Windows 10.
Consequently, no third-party programs are needed to do this task.
In addition, it is possible to burn information or media files to the disk.
All right, thats it for now, I hope you enjoyed it.
