There will come a time when youll need to insert an image in your Google Docs document.
The good news is that its easy and the instructions are beginner friendly.
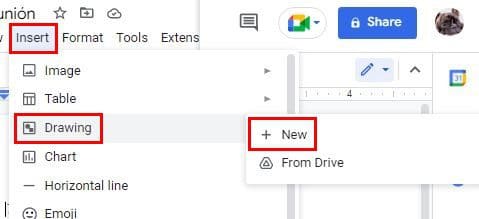
When you place the cursor on the image option, a side menu will appear with source options.
Choose the Image option, followed by the source.
you’ve got the option to choose from your devices gallery, camera, or the web.
Thats all there is to it when adding an image from your gear and Android gear.

This is something you’re able to only do on Google Docs web.
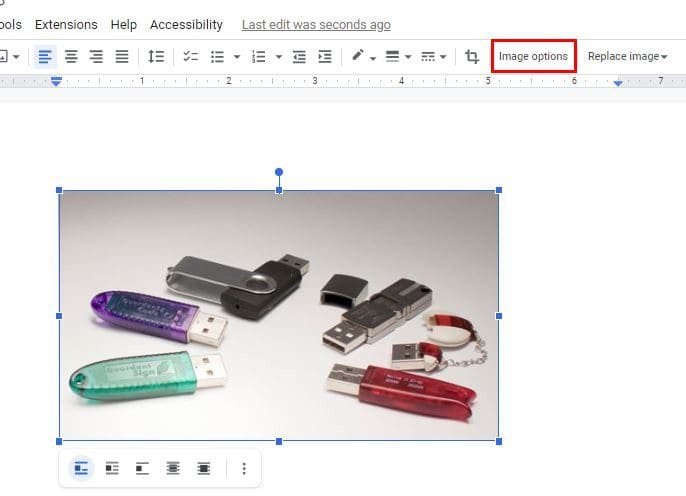
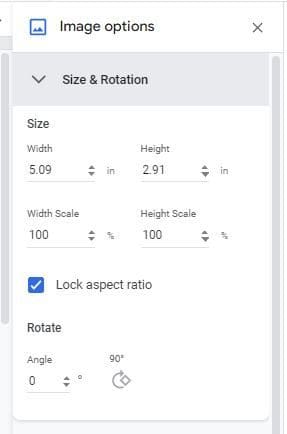
press the image to select it, and press Image Options once its highlighted in blue.
Youll see a new set of options when you choose Image Options.

One of those options will be Size and rotation.
It is going to be the first option on the list.
you might modify options such as Width, Height, Width Scale, and Height Scale.
Towards the bottom, youll see the options to rotate to a specific angle or at a 90-degree angle.
There is an option called Rotation Control.
At the top of the image, youre going to see two dots on top of each other.

hit the top dot and move it around.
When its in a position youre happy with, let go, and youve just moved your image.
If you oughta flip the image, that can also be done.
When the side menu appears, choose the New option.
On the next page, hit the image icon and add the image you want to flip.
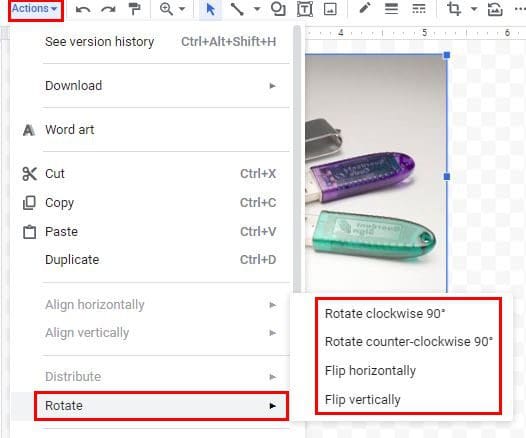
Once youve added the image, punch the Actions button on the left of the above options.

Place the cursor on the rotate option at the bottom and choose the flipping option.
you could choose from options such as:
Conclusion