TheWindows File Protection featurein Microsoft Windows prevents programs from replacing critical Windows system files.
You may have to turn the feature on or off in certain configurations.
it’s possible for you to enable or disable Windows File Protection in Microsoft Windows with a registry edit.

Just use these steps.
Note: Windows File Protection is enabled by default in all versions of Microsoft Windows.
This post applies to Windows 10, 8, 7, and Vista.
Some features remain the same, while others get a new name.
For example, you may have heard of Windows File Protection in previous Windows versions.
But with Windows 11, its under a new name.
Windows File Protection in Windows 11 is calledWindows Resource Protection.
You couldnt find it if youve been trying to find it with the old name.
Windows Resource Protection keeps registry folders and keys, including crucial system files, safe.
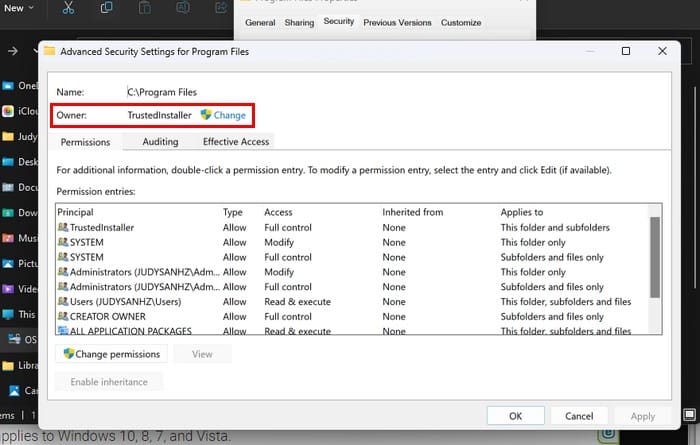
you’re free to only access WRP (Windows Resource Protection)-protected resources through the TrustedInstaller.
TrustedInstaller ensures the Windows updates are downloaded and installed correctly onto your system.
Its a necessary part of your OS since it handles complex operating within your rig.

That means that youll end up having to restore Windows 11.
When the Program Files Properties window opens, select theSecurity tab, followed by theAdvancedbutton at the bottom right.
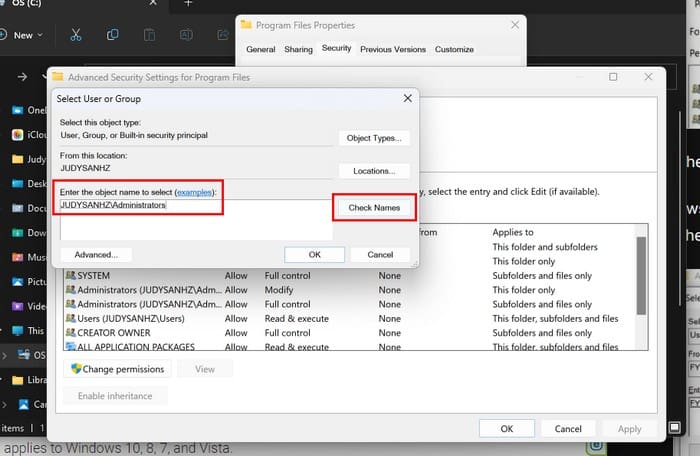
Windows will fill in the rest.
ClickOKto save the changes.
When the transfer is official, youll see your name where it once said TrustedInstaller.
Below the new owners name, youll also see an option calledreplace owner on sub containers and objects.
If you want the ownership change to apply to your files in that folder, nudge the option.
ClickOkto goback to Properties.
Press the Windows + R keys, and the Run dialog box will open.
pop in cmd, press Ctrl + Shift + Enter, and itll open as an administrator.
When it opens, typesfc /scannowand pressEnter.
Now would be an excellent time to get that cup of coffee.
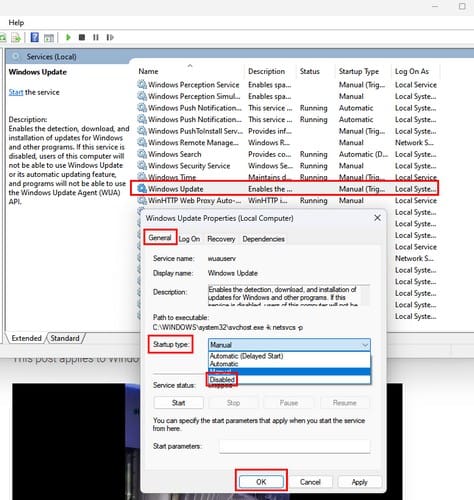
To open Services, press theWindows + Rkeys and typeservices.mscwhen it opens.
Remember to click OK. Scroll until you come across theWindows Updateoption andright-clickto go toProperties.
In thedropdown menufor theStartup bang out, chooseDisabled.
ClickOK, and youre good to go.
To get there, open theRun boxby pressing theWindows + Rkeys.
Typemsconfig and press enter.
tap on theServices taband ensure touncheck the box for Windows Modules Installer.
ClickOkto preserve your changes.
Windows Module Installer option in Windows 11
