Setting up a particular printer as the default printer was a very easy task in Windows 7.
But if you want to do it in Windows 10, it would bea bit difficult.
Sometimes we need to use multiple printers on a computer.
We want to set a particular printer as the default printer.
The default printer will be come up as the selected printer when you give print command.
Sometimes, we need to change the default printer to another one as well.
c’mon follow the following steps.
Open this, then choose Devices and Printers from the list of icons.
Youll see a new bunch of icons, which represent the hardware you have available.
Right-hit this and read the menu that comes up.
About halfway down theres a line which says Set as the default printer, and you better select that.
If a confirmation box appears, press OK.
Your new default printer is now set!
Most people who use Microsofts Windows 10 operating system will need to do at least a bit of printing.
If your printer uses wireless rather than a USB connection, check that as well.
Set up default printer using default tweaks
This one is pretty easy.
First, go toSettings, and then choose the icon markedDevices.
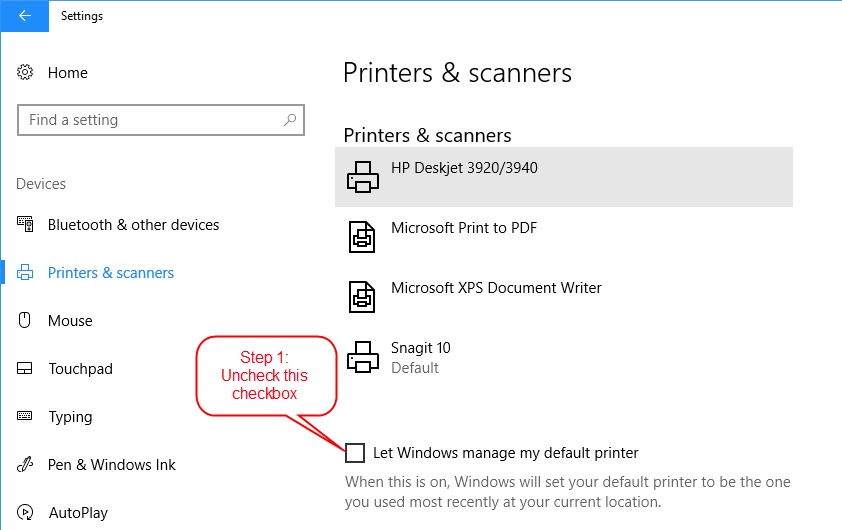
On the left, youll see Printers & scanners, so click that.
At the bottom right, theres a checkbox called Let Windows manage my default printer youll need toUNCHECKthis box.
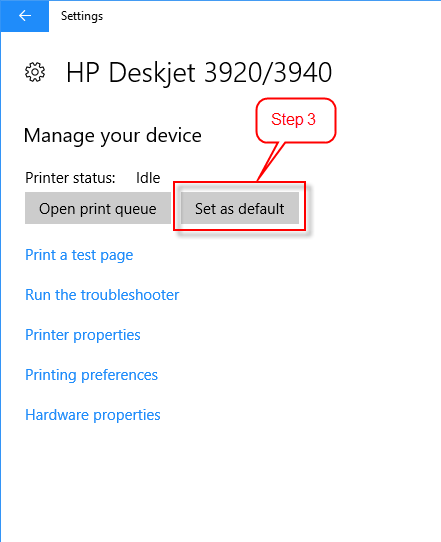
grab the printer you want to use, then confirm by clicking on the Set as default button.
Thats it youre done!
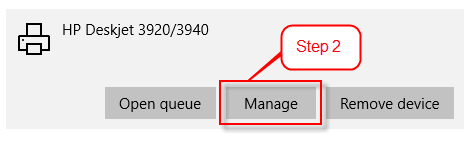
Here is a list of all the printers that can be used with your PC.
Find the one you want to set as default and note down its name.
Letting Windows manage printers automatically
Open up controls, then go to Devices.
Find the checkbox for Let Windows manage my default printer and CHECK it.
